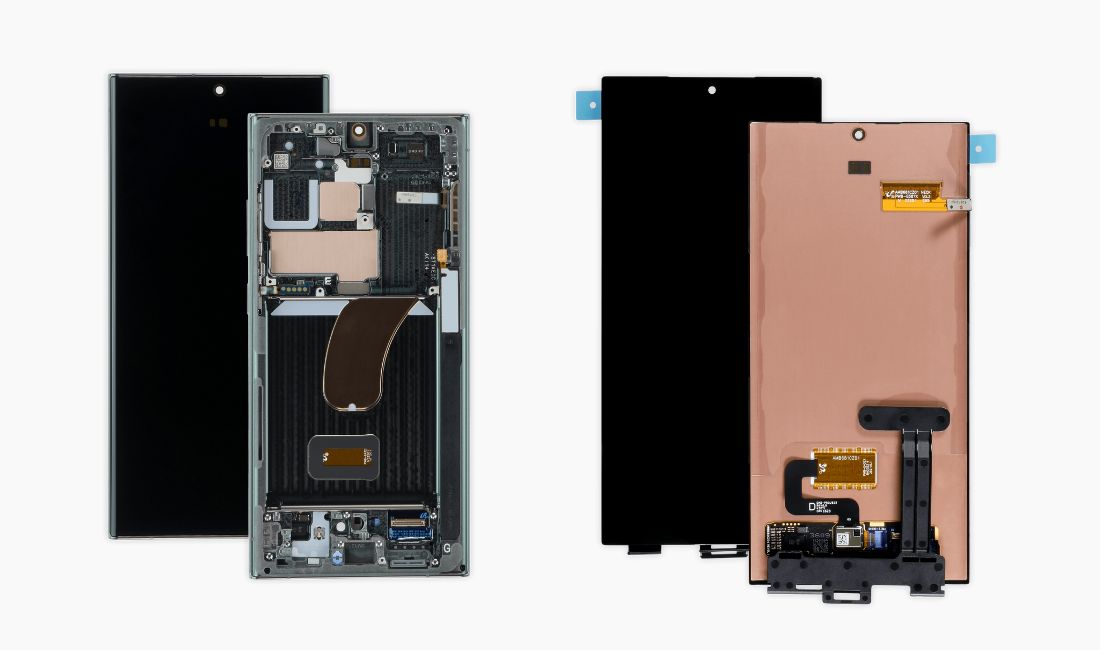
If your smartphone’s display is broken, a replacement is the obvious choice. Until now, some smartphone manufacturers have offered complete screen units to enable a quick repair. But Samsung is taking a new step towards sustainability and will not be selling complete units in future – at least it’s like this for their current flagship. Instead, the Galaxy S23 Ultra screen will only be available separately, without a frame. In this article, we show you what this means for you and what future display repairs will look like. We’ll also show you how you can attach the adhesive frame yourself to optimally mount your display. Jump directly to the quick start guide.
What’s the difference between a screen unit and a single screen?
Every smartphone screen consists of many different components – from the glass, touch sensors and pixel technologies to the frame that holds everything together. This construct is called a screen unit. The repair is a little less complicated with this spare part, but you also replace components that are not broken at all. In order to pursue its sustainability goals, Samsung no longer sells screen units, but only the separated display – without the frame. For the time being, this only applies to the Galaxy S23 Ultra. But we expect this change in strategy for future Samsung models as well.

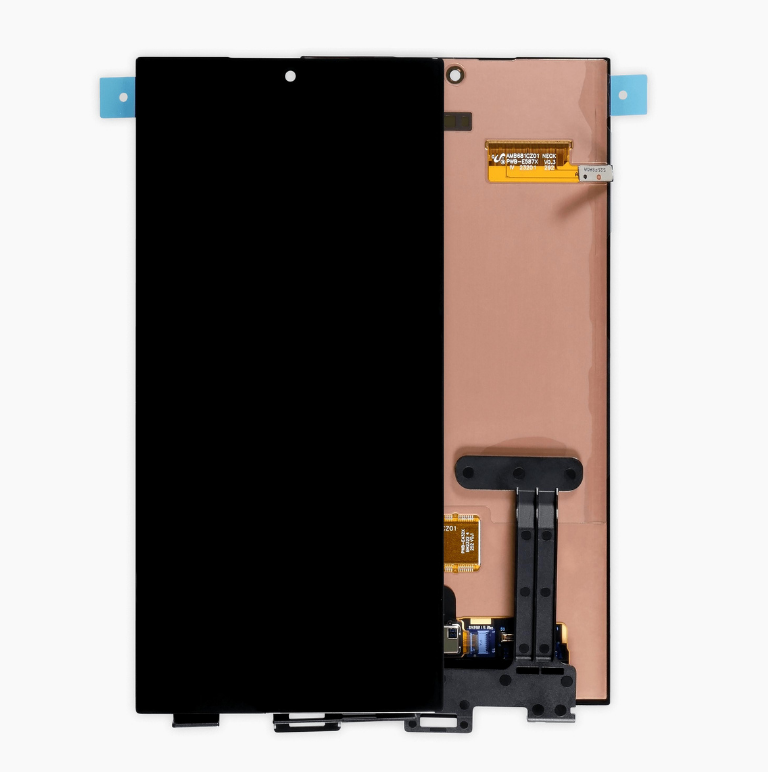
How does this affect the repair?
If you use a screen that misses the frame, you have to put the two together yourself. To do this, you must first remove the broken display completely from the frame. The display is glued to the frame, so you can easily loosen it. It is important to remove all the old adhesive residue, because this is the only way the new adhesive can really stick. For us, this worked great with a spudger.
Once all residues have been removed, you can attach the new screen to the cleaned frame. We will supply you with a suitable adhesive frame for this purpose. Once the new screen and the existing frame are glued together, you can continue with the repair as usual.
Quick guide on how to apply the adhesive surfaces of the Samsung Galaxy S23 Ultra
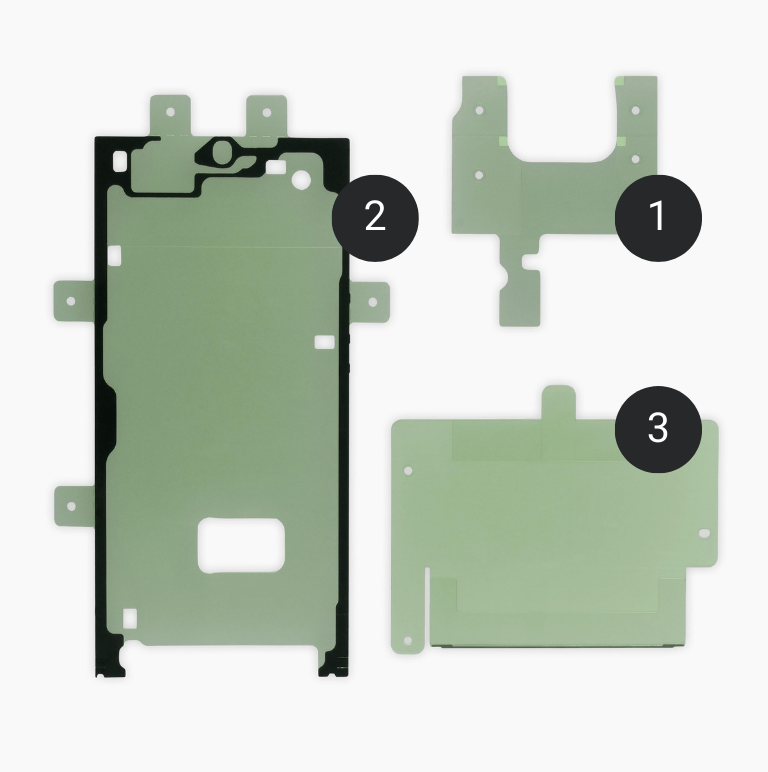
At a glance: the adhesive frame
The adhesive for the Galaxy S23 Ultra display consists of three parts and is applied to your frame in four steps. We show you how it’s done!
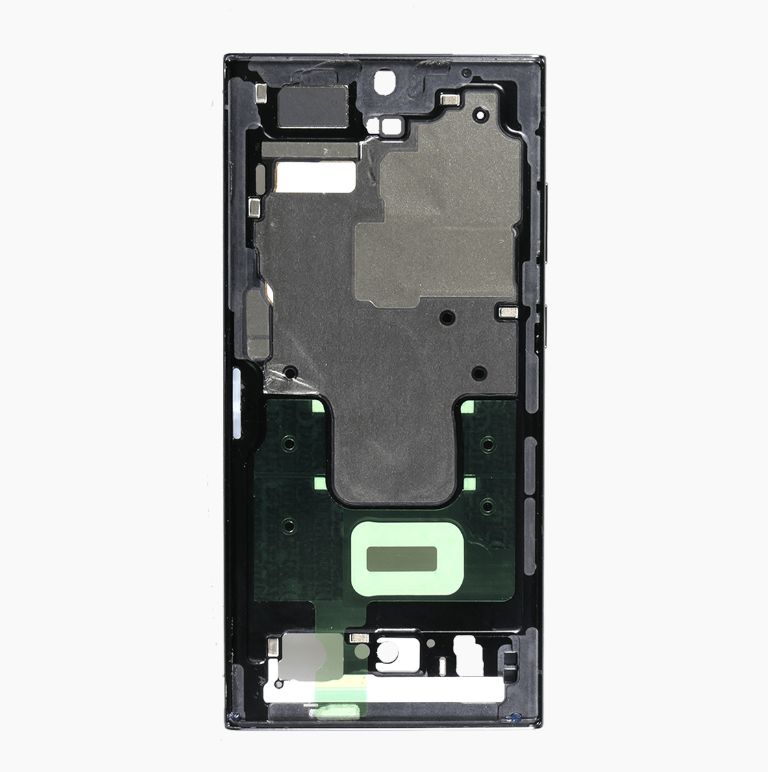
Step 1
Place the smallest part of the adhesive (mark 1 in the picture above) with the tab facing down. Use the round cut-outs as a guide when placing the adhesive. The protective film will be removed at the very end!
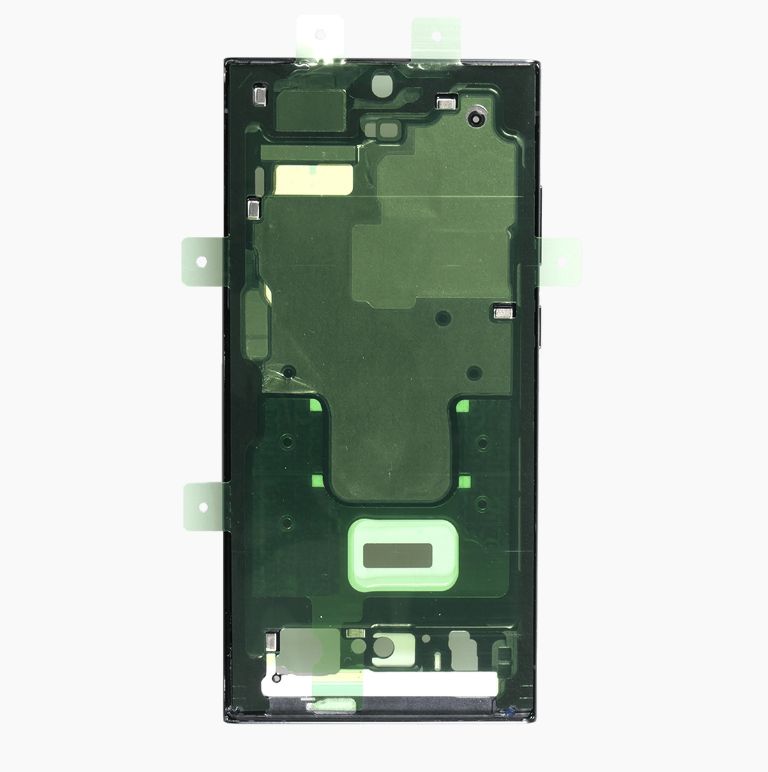
Step 2
Now follow with the largest part of the adhesive (mark 2 in the picture above), which is as large as the frame itself. You can align this with the camera cut-out. The small white buffers of the frame are still visible through the cut.outs. Leave the protective film on here too.
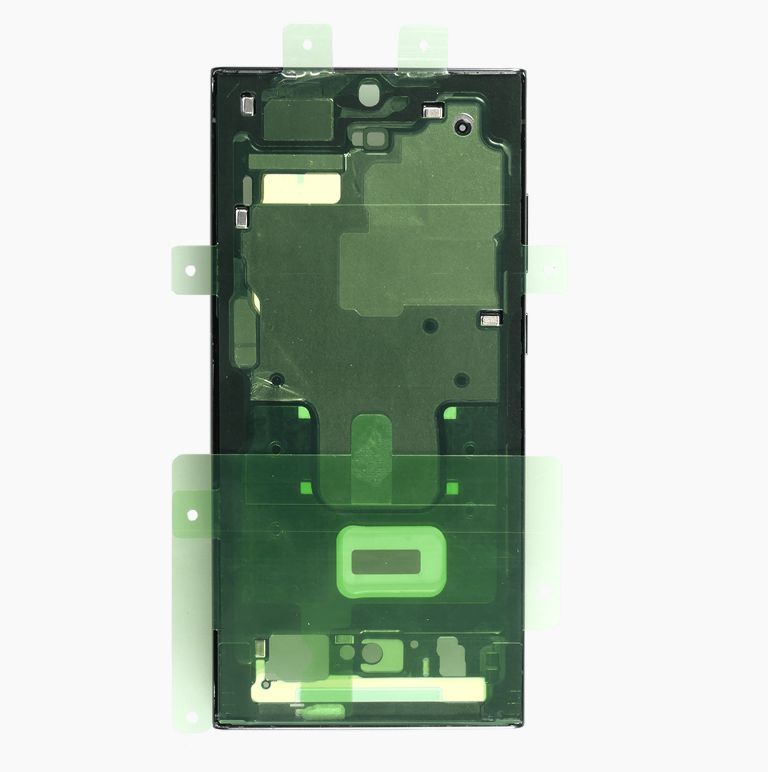
Step 3
Finally, apply the widest adhesive frame (mark 3 in the picture above). This only carries a narrow adhesive strip at the bottom edge. When placing it, orientate yourself on the holes of the tabs, they must be on top of each other.
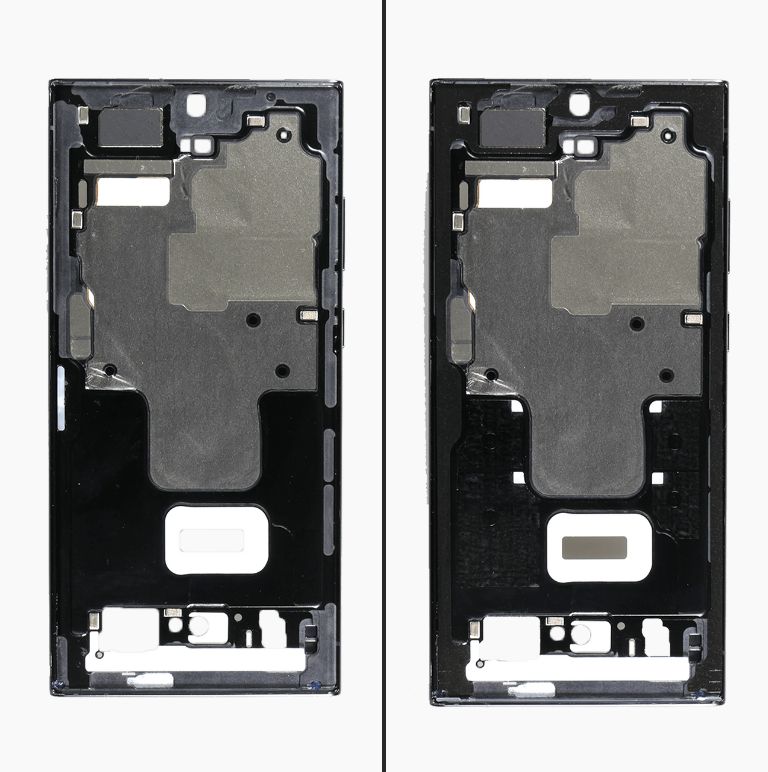
Step 4
Use a spudger to tighten the glued surfaces so that they stick well to the frame. Then you can carefully peel off the film. Here you do it the other way round: First remove the widest film and make sure that the narrow adhesive strip is really tight. Then go on with film 2 and film 1.
Now the adhesive is perfectly in place and you can attach your new display to your frame!


