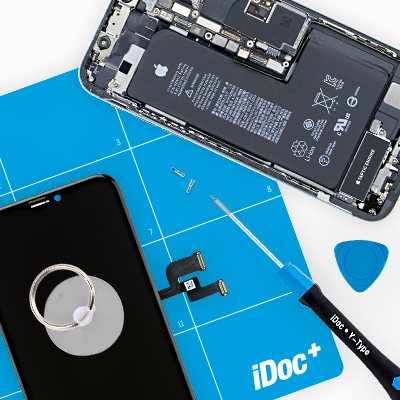
The standby or volume button of your iPhone 8 no longer work?

Even if the ring/silent switch or the flash light does not work, this may be an indication of a defective volume control cable, as all the above-mentioned components share the same cable set.

In this manual we will show you step by step how to change the volume control cable of your iPhone on your own to make your buttons and flash light fully functional again.

We wish you much success and above all fun with the repair. If our instructions have helped you, please leave us a positive evaluation.

Required tools

  • Heat gun

    Heat gun

    You can use a heat gun to heat parts that are glued on so they’re easier to remove. In most cases, you can also use a hairdryer.

    from €15.99 on Amazon
  • For storing screws

    For storing screws

    We recommend storing your screws so you don’t mix up the various screws and small parts.

    from €10.99 on Amazon
  • Menda ESD Spudger

    Menda ESD Spudger

    You need a flat plastic prying tool to disconnect the various plugs and connectors.

    from €26.38 on Amazon
  • Pick Set

    Pick Set

    You need a flat but stable tool such as a pick to pry out parts that are glued in place.

    from €14.99 on Amazon
  • Steel Laboratory Spatula

    Steel Laboratory Spatula

    You need a flat and sturdy prying tool to disconnect glued parts.

    on Amazon
  • Pentalobe PL1 screwdriver

    Pentalobe PL1 screwdriver

    You need the right screwdriver for removing pentalobe PL1 screws.

    on Amazon
  • Phillips PH00 screwdriver

    Phillips PH00 screwdriver

    You need the right screwdriver for removing PH00 screws.

    from €10.84 on Amazon
  • Y-type Y000 screwdriver

    Y-type Y000 screwdriver

    You need the right screwdriver for removing Y-type screws.

    on Amazon

Required replacement part

  • iPhone 8 Standby/Volume Control Cable

    iPhone 8 Standby/Volume Control Cable

    on Amazon
Show all replacement parts for the iPhone 8 

Getting started with the repair of your iPhone 8

If you get stuck or have questions, you can post a comment. We’d be happy to help.

36 steps
  1. Switching off your device

    iPhone 8 - Switching off your device 01
    iPhone 8 - Switching off your device 02
    iPhone 8 - Switching off your device 03
    1. Turn your iPhone off completely to protect it from a potential short circuit. To do this, press the standby button for about three seconds until the slider "Turn off" appears on the screen.
    2. Swipe the slider from left to right and wait until your iPhone has completely shut down.
  2. Removing the rear case screws

    iPhone 8 - Removing the rear case screws 01
    iPhone 8 - Removing the rear case screws 02
    Used tools
    Wiha PicoFinish Pentalobe Screwdriver PL1
    • 2 × 3.4mm Pentalobe

    You need a pentalobe screwdriver (PL1) to open the iPhone 8.

    1. Loosen the two Pentalobe screws on the left and right side of the Lightning Connector and put them into a screw storage.

    We recommend you using a screw storage to avoid losing any of the removed parts or screws. You can convert an old sewing box for this purpose. We at iDoc use a high quality magnetic mat for our repairs, which allows the removed parts to be arranged in the same way as they were in the phone. This way you know exactly where each screw was located, which makes it much easier for you to assemble later.


    Used tools
    Wiha PicoFinish Pentalobe Screwdriver PL1
  3. Heating up the display

    iPhone 8 - Heating up the display 01
    iPhone 8 - Heating up the display 02
    Used tools
    Heat gun

    The iPhone 8 is opened via the display, which is strongly glued to the rest of the case. To open it, you have to heat the adhesive first.

    1. First, place your iPhone 8 on a soft and clean surface to avoid scratches when lifting the display.T
    2. Then use a hot air tool, such as a hot air dryer or a regular hairdryer, to evenly cover the outside of the display.

    The rule of thumb is to heat your device only to the extent that you can still touch it without burning your fingers.

    Used tools
  4. Detaching the display

    iPhone 8 - Detaching the display 01
    iPhone 8 - Detaching the display 02
    iPhone 8 - Detaching the display 03
    Used tools
    Flat Picks
    VAKUPLASTIC Suction Cup

    Opening the iPhone 8 will void the warranty of protection against dust and splashing water, as well as the warranty of waterproofness.

    1. Press a suction cup on the display above the Home button and pull it upwards to create a narrow gap between the aluminium and display frames.
    2. Insert a flat plastic tool into the narrow gap between the aluminum and display frames. Try to enlarge the gap by pushing the aluminium frame upwards with the tool. We use flat plastic picks for this.

    Be careful not to insert the picks on the side of the standby button too far to avoid damaging the display's flex cable.

    1. Now move the pick once around the display. To prevent the adhesive from reattaching to the already loosened areas, heat the edge of the display again and again and leave individual picks in the device frame.


    Used tools
    VAKUPLASTIC Suction Cup
  5. Opening the display

    iPhone 8 - Opening the display 01
    iPhone 8 - Opening the display 02
    Used tools
    Flat Picks

    As long as it is still connected, you must never open the display more than 180°, otherwise the sensitive flex cables may tear.

    1. Gently push the display upwards with the plectrum to release the lugs from the aluminium frame.
    2. Then open it laterally towards the standby button. Lean the display against a stable object to avoid overstretching the flexible cables.
    Used tools
  6. Disconnecting the battery connector

    iPhone 8 - Disconnecting the battery connector 01
    iPhone 8 - Disconnecting the battery connector 02
    iPhone 8 - Disconnecting the battery connector 03
    iPhone 8 - Disconnecting the battery connector 04
    Used tools
    Pry Tool
    Wiha PicoFinish Phillips Screwdriver PH00
    Piergiacomi Tweezers 2a SA ESD
    • 2 × 2.6 mm Phillips
    • 2 × 1.0 mm Phillips

    Before starting the repair, disconnect the battery connector to prevent short circuits and avoid accidentally turning on your device during the repair.

    1. Use a phillips screwdriver to remove the four phillips screws. Then carefully take off the cover with tweezers.
    2. Now disconnect the battery connector by carefully levering it off with a lever tool. For this purpose we use a plastic spudger.
    Used tools
    Wiha PicoFinish Phillips Screwdriver PH00
    Piergiacomi Tweezers 2a SA ESD
  7. Disconnecting the display connectors

    iPhone 8 - Disconnecting the display connectors 01
    iPhone 8 - Disconnecting the display connectors 02
    iPhone 8 - Disconnecting the display connectors 03
    iPhone 8 - Disconnecting the display connectors 04
    Used tools
    Pry Tool
    • Connector
    1. Use the spudger to also disconnect the display connectors (display and home button).
    Used tools
  8. Disconnecting the FaceTime connector

    iPhone 8 - Disconnecting the FaceTime connector 01
    iPhone 8 - Disconnecting the FaceTime connector 02
    iPhone 8 - Disconnecting the FaceTime connector 03
    iPhone 8 - Disconnecting the FaceTime connector 04
    Used tools
    Pry Tool
    Wiha PicoFinish Phillips Screwdriver PH00
    Piergiacomi Tweezers 2a SA ESD
    • 3 × 1.0 mm Phillips
    1. Unscrew the three Phillips screws from the cover plate above the connector.
    2. Use tweezers to remove the cover plate from your iPhone 8.
    3. Carefully separate the FaceTime connector from the board with a spudger.
    4. Now you can remove the display completely.
    Used tools
    Wiha PicoFinish Phillips Screwdriver PH00
    Piergiacomi Tweezers 2a SA ESD
  9. Removing the iSight camera

    iPhone 8 - Removing the iSight camera  01
    iPhone 8 - Removing the iSight camera  02
    iPhone 8 - Removing the iSight camera  03
    iPhone 8 - Removing the iSight camera  04
    iPhone 8 - Removing the iSight camera  05
    iPhone 8 - Removing the iSight camera  06
    Used tools
    Pry Tool
    Wiha PicoFinish Phillips Screwdriver PH00
    Piergiacomi Tweezers 2a SA ESD
    • 1 × 2.9 mm Phillips
    • 1 × 3.0 mm Standoff
    • Connector
    1. Loosen the screws and remove the cover plate of the iSight camera.

    Special screwdrivers are available for the stand-off screw. But you can also use an ordinary, narrow slotted screwdriver.

    1. Gently slide the plastic spudger under the camera's connector and lift it off.
    2. Now take the camera out of your iPhone 8.
    Used tools
    Wiha PicoFinish Phillips Screwdriver PH00
    Piergiacomi Tweezers 2a SA ESD
  10. Disconnecting the connector of the volume control cable

    iPhone 8 - Disconnecting the connector of the volume control cable 01
    iPhone 8 - Disconnecting the connector of the volume control cable 02
    iPhone 8 - Disconnecting the connector of the volume control cable 03
    iPhone 8 - Disconnecting the connector of the volume control cable 04
    Used tools
    Pry Tool
    Wiha PicoFinish Phillips Screwdriver PH00
    Piergiacomi Tweezers 2a SA ESD
    • 1 × 1.1 mm Phillips
    • 1 × 2.7 mm Phillips
    1. First remove the screws of the bracket plate.
    2. Take the bracket plate out of your device.
    3. Disconnect the connector from the logicboard, by levering it carefully with a plastic spudger.
    Used tools
    Wiha PicoFinish Phillips Screwdriver PH00
    Piergiacomi Tweezers 2a SA ESD
  11. Removing the plastic bracket

    iPhone 8 - Removing the plastic bracket 01
    iPhone 8 - Removing the plastic bracket 02
    iPhone 8 - Removing the plastic bracket 03
    iPhone 8 - Removing the plastic bracket 04
    iPhone 8 - Removing the plastic bracket 05
    iPhone 8 - Removing the plastic bracket 06
    Used tools
    Wiha PicoFinish Phillips Screwdriver PH00
    Piergiacomi Tweezers 2a SA ESD
    • 2 × 1.2 mm Philliips
    • 2 × 1.0 mm Philliips
    • 1 × 2.5 mm Phillips
    • 1 × 1.4 mm Phillips
    1. First loosen the screws of the plastic bracket.

    One of the screws is screwed into the side of the backcover.

    1. Then take out the plastic bracket. Under it there are more screws, with which a kind of connector is fixed.
    2. Remove the screws of the connector and take it out.
    Used tools
    Wiha PicoFinish Phillips Screwdriver PH00
    Piergiacomi Tweezers 2a SA ESD
  12. Removing the Wi-Fi antenna

    iPhone 8 - Removing the Wi-Fi antenna  01
    iPhone 8 - Removing the Wi-Fi antenna  02
    iPhone 8 - Removing the Wi-Fi antenna  03
    iPhone 8 - Removing the Wi-Fi antenna  04
    iPhone 8 - Removing the Wi-Fi antenna  05
    iPhone 8 - Removing the Wi-Fi antenna  06
    Used tools
    Pry Tool
    Wiha PicoFinish Phillips Screwdriver PH00
    Piergiacomi Tweezers 2a SA ESD
    • 1 × 1.3 mm Phillips
    • 1 × 1.2 mm Phillips
    • Connector
    1. First remove the Phillips screws that secure the antenna.
    2. Then remove the connector from the board.
    3. Loosen the slightly stuck antenna by heating it with a little hot air and carefully levering it off with a spatula.
    Used tools
    Wiha PicoFinish Phillips Screwdriver PH00
    Piergiacomi Tweezers 2a SA ESD
  13. Removing the SIM card tray

    iPhone 8 - Removing the SIM card tray  01
    iPhone 8 - Removing the SIM card tray  02
    iPhone 8 - Removing the SIM card tray  03
    Used tools
    SIM Tool
    1. You can use the SIM tool or a paper clip to remove the SIM card holder. Press the SIM tool into the small hole next to the SIM card holder.
    Used tools
  14. Disconnecting the logicboard connectors

    iPhone 8 - Disconnecting the logicboard connectors 01
    iPhone 8 - Disconnecting the logicboard connectors 02
    iPhone 8 - Disconnecting the logicboard connectors 03
    iPhone 8 - Disconnecting the logicboard connectors 04
    iPhone 8 - Disconnecting the logicboard connectors 05
    Used tools
    Pry Tool
    • Connector
    1. Use a spudger to carefully disconnect the three connectors on the battery side of the logicboard.
    Used tools
  15. Removing the logic board

    iPhone 8 - Removing the logic board  01
    iPhone 8 - Removing the logic board  02
    iPhone 8 - Removing the logic board  03
    iPhone 8 - Removing the logic board  04
    iPhone 8 - Removing the logic board  05
    iPhone 8 - Removing the logic board  06
    iPhone 8 - Removing the logic board  07
    Used tools
    Wiha PicoFinish Phillips Screwdriver PH00
    Piergiacomi Tweezers 2a SA ESD
    • 1 × 2.4 mm Standoff
    • 1 × 2.1 mm Standoff
    • 1 × 1.6 mm Phillips
    1. Unscrew all screws that hold the logic board in place.
    2. The Phillips screw is covered by a sticker (see photo).

    3. Now you can carefully remove the logic board by hand. Next to the two holes for the iSight camera, there is a plastic holder for a screw.. This plastic holder is placed on top of the logicboard.
    Used tools
    Wiha PicoFinish Phillips Screwdriver PH00
    Piergiacomi Tweezers 2a SA ESD
  16. Removing the speaker

    iPhone 8 - Removing the speaker  01
    iPhone 8 - Removing the speaker  02
    iPhone 8 - Removing the speaker  03
    iPhone 8 - Removing the speaker  04
    iPhone 8 - Removing the speaker  05
    iPhone 8 - Removing the speaker  06
    iPhone 8 - Removing the speaker  07
    Used tools
    Pry Tool
    Wiha PicoFinish Phillips Screwdriver PH00
    Piergiacomi Tweezers 2a SA ESD
    Wiha PicoFinish Y-Type Screwdriver Y000
    • 1 × 1.2 mm Y-type
    • 1 × 2.9 mm Phillips
    • 1 × 2.5 mm Phillips
    • 1 × 1.4 mm Phillips
    • 1 × 2.1 mm Phillips
    1. First loosen the screws of the cover plate that lies over the connector of the flex cable and put it aside.
    2. Then disconnect the connector of the flex cable and lift it up.
    3. Then loosen the screws of the speaker.
    4. You can now lift out the speaker and the flex cable.
    Used tools
    Wiha PicoFinish Phillips Screwdriver PH00
    Piergiacomi Tweezers 2a SA ESD
    Wiha PicoFinish Y-Type Screwdriver Y000
  17. Removing the Taptic Engine

    iPhone 8 - Removing the Taptic Engine  01
    iPhone 8 - Removing the Taptic Engine  02
    iPhone 8 - Removing the Taptic Engine  03
    iPhone 8 - Removing the Taptic Engine  04
    iPhone 8 - Removing the Taptic Engine  05
    iPhone 8 - Removing the Taptic Engine  06
    iPhone 8 - Removing the Taptic Engine  07
    iPhone 8 - Removing the Taptic Engine  08
    Used tools
    Pry Tool
    Wiha PicoFinish Phillips Screwdriver PH00
    Piergiacomi Tweezers 2a SA ESD
    • 1 × 2.0 mm Standoff
    • 1 × 2.0 mm Phillips
    1. First detach the small flex cable above the connector of the Taptic Engine with a spudger or tweezers.
    2. Then loosen the screws that secure the Taptic Engine.
    3. Carefully lever the Taptic Engine connector with a spudger and remove the Taptic Engine from your device.
    Used tools
    Wiha PicoFinish Phillips Screwdriver PH00
    Piergiacomi Tweezers 2a SA ESD
  18. Removing the battery

    iPhone 8 - Removing the battery 01
    iPhone 8 - Removing the battery 02
    iPhone 8 - Removing the battery 03
    iPhone 8 - Removing the battery 04
    iPhone 8 - Removing the battery 05
    iPhone 8 - Removing the battery 06
    Used tools
    Piergiacomi Tweezers 2a SA ESD

    The iPhone 8 battery is attached to the case with four tabs that you can pull out by their tabs. The tabs are taped to the top and bottom edges of the battery.

    1. Use tweezers or a spatula to remove the black tabs from the battery. Underneath are the white adhesive strips.

    When pulling out the adhesive strips, take care not to damage the contact of the standby and volume cable.

    While pulling the tapes, hold the battery and iPhone firmly to prevent the battery from falling out of the device.

    If one of the tabs tears, you will need to gently lever the battery out with a wide spudder. Try to bend the battery as little as possible.

    1. When all the adhesive strips have come off, you can remove the battery.
    Used tools
    Piergiacomi Tweezers 2a SA ESD
  19. The right tools for your repair

    With the right tools, you will succeed in any repair. In our store you will find a large selection of professional quality tools.
    VIEW NOW
  20. Removing the volume control cable

    iPhone 8 - Removing the volume control cable 01
    iPhone 8 - Removing the volume control cable 02
    iPhone 8 - Removing the volume control cable 03
    iPhone 8 - Removing the volume control cable 04
    iPhone 8 - Removing the volume control cable 05
    iPhone 8 - Removing the volume control cable 06
    iPhone 8 - Removing the volume control cable 07
    iPhone 8 - Removing the volume control cable 08
    Used tools
    Heat gun
    Wiha PicoFinish Phillips Screwdriver PH00
    • 1 × 2.4 mm Standoff
    • 2 × 1.6 mm Phillips
    • 1 × 2.6 mm Phillips
    • 2 × 2.3 mm Phillips
    1. First remove the stand-off screw on the flash cover.
    2. Then remove the five Phillips screws that attach the volume control cable.

    Heating the cable briefly will make it easier to remove it from the back cover.

    1. Move the flat side of the steel spatula under the flex cable and carefully separate it from the bottom of the backcover.
    2. Also carefully lift the small golden microphone hanging from the same cable set out of its guide with the spatula.
    3. Now you can remove the cable.
    Used tools
    Wiha PicoFinish Phillips Screwdriver PH00
  21. Installing the volume control cable

    iPhone 8 - Installing the volume control cable 01
    iPhone 8 - Installing the volume control cable 02
    iPhone 8 - Installing the volume control cable 03
    iPhone 8 - Installing the volume control cable 04
    iPhone 8 - Installing the volume control cable 05
    Used tools
    Wiha PicoFinish Phillips Screwdriver PH00
    Piergiacomi Tweezers 2a SA ESD
    • 2 × 1.6 mm Phillips
    • 1 × 2.6 mm Phillips
    • 2 × 2.3 mm Phillips
    • 1 × 2.4 mm Standoff

    When inserting the flex cable, make sure that the cable lies flat, and that the microphone and flash are correctly aligned before you screw the flex cable on.

    1. Put the flex cable of the standby button and the volume buttons back into the back cover and fix it with the five Phillips screws.
    2. Check the pressure sensitivity of the buttons after tightening the screws and readjust if necessary.
    3. Press the entire cable set, including microphone and flash light, firmly into the case.
    4. Fix the bracket plate of the flash light with the stand-off screw.
    Used tools
    Wiha PicoFinish Phillips Screwdriver PH00
    Piergiacomi Tweezers 2a SA ESD
  22. Inserting the battery

    iPhone 8 - Inserting the battery 01
    iPhone 8 - Inserting the battery 02
    iPhone 8 - Inserting the battery 03
    iPhone 8 - Inserting the battery 04
    1. Place the battery back into the case of your iPhone 8, using the battery connector as a guide to position the battery correctly.

    Leave some space on all sides of the battery to other components.


  23. Installing the Taptic Engine

    iPhone 8 - Installing the Taptic Engine  01
    iPhone 8 - Installing the Taptic Engine  02
    iPhone 8 - Installing the Taptic Engine  03
    iPhone 8 - Installing the Taptic Engine  04
    iPhone 8 - Installing the Taptic Engine  05
    iPhone 8 - Installing the Taptic Engine  06
    Used tools
    Pry Tool
    Wiha PicoFinish Phillips Screwdriver PH00
    Piergiacomi Tweezers 2a SA ESD
    • 1 × 2.0 mm Standoff
    • 1 × 2.0 mm Phillips
    1. Put the Taptic Engine back between the battery and the Lightning connector.

    Make sure the screw holes of the Taptic Engine sit correctly, in order to avoid damaging the screws.

    1. Connect the Taptic Engine’s connector.
    2. Screw the Taptic Engine tight with the Standoff- and Phillips screw.
    3. Insert the mini flex cable and attach its connector.
    Used tools
    Wiha PicoFinish Phillips Screwdriver PH00
    Piergiacomi Tweezers 2a SA ESD
  24. Inserting the speaker

    iPhone 8 - Inserting the speaker  01
    iPhone 8 - Inserting the speaker  02
    iPhone 8 - Inserting the speaker  03
    iPhone 8 - Inserting the speaker  04
    iPhone 8 - Inserting the speaker  05
    iPhone 8 - Inserting the speaker  06
    Used tools
    Wiha PicoFinish Phillips Screwdriver PH00
    Piergiacomi Tweezers 2a SA ESD
    Wiha PicoFinish Y-Type Screwdriver Y000
    • 1 × 2.1 mm Phillips
    • 1 × 1.4 mm Phillips
    • 1 × 1.2 mm Y-type
    • 1 × 2.9 mm Phillips
    • 1 × 2.5 mm Phillips
    Make sure to correctly position the flex cable between the battery and the speaker
    1. Place the speaker back in its original position in the rear case and press it down.
    2. Now you can fasten the speaker using the two Phillips-screws.
    3. Press in the connector of the speaker.
    4. Reinsert the bracket plate over the flex cable and fasten it using the three screws.
    Used tools
    Wiha PicoFinish Phillips Screwdriver PH00
    Piergiacomi Tweezers 2a SA ESD
    Wiha PicoFinish Y-Type Screwdriver Y000
  25. Inserting the logicboard

    iPhone 8 - Inserting the logicboard  01
    iPhone 8 - Inserting the logicboard  02
    iPhone 8 - Inserting the logicboard  03
    iPhone 8 - Inserting the logicboard  04
    iPhone 8 - Inserting the logicboard  05
    Used tools
    Wiha PicoFinish Phillips Screwdriver PH00
    Piergiacomi Tweezers 2a SA ESD
    • 1 × 2.4 mm Standoff
    • 1 × 2.1 mm Standoff
    • 1 × 1.6 mm Phillips
    1. Reinsert the logicboard in its original position.

    The camera holder should be on top of the logicboard (over the screw hole on the top right in the image).

    1. Fasten the logic board using the screws.
    Used tools
    Wiha PicoFinish Phillips Screwdriver PH00
    Piergiacomi Tweezers 2a SA ESD
  26. Connecting the connectors on the logicboard

    iPhone 8 - Connecting the connectors on the logicboard 01
    iPhone 8 - Connecting the connectors on the logicboard 02
    iPhone 8 - Connecting the connectors on the logicboard 03
    • Connector

    Connect the three connectors of the logicboard.

    1. First position the connectors over their sockets and then carefully press them in with your finger.
  27. Inserting the SIM card tray

    iPhone 8 - Inserting the SIM card tray  01
    iPhone 8 - Inserting the SIM card tray  02
    iPhone 8 - Inserting the SIM card tray  03
    1. Now insert the SIM card tray into its slot.

    If you’re having trouble sliding it in, check the position of the logicboard.

  28. Installing the Wi-Fi antenna

    iPhone 8 - Installing the Wi-Fi antenna  01
    iPhone 8 - Installing the Wi-Fi antenna  02
    iPhone 8 - Installing the Wi-Fi antenna  03
    iPhone 8 - Installing the Wi-Fi antenna  04
    Used tools
    Wiha PicoFinish Phillips Screwdriver PH00
    Piergiacomi Tweezers 2a SA ESD
    • 1 × 1.3 mm Phillips
    • 1 × 1.2 mm Phillips
    • Connector
    1. Put the Wi-Fi antenna back in its original position and gently press it on to restore the adhesion.
    2. Connect the antenna's connector.
    3. Then, attach the bracket plate with the two Phillips-screws.
    Used tools
    Wiha PicoFinish Phillips Screwdriver PH00
    Piergiacomi Tweezers 2a SA ESD
  29. Installing the plastic bracket

    iPhone 8 - Installing the plastic bracket 01
    iPhone 8 - Installing the plastic bracket 02
    iPhone 8 - Installing the plastic bracket 03
    iPhone 8 - Installing the plastic bracket 04
    iPhone 8 - Installing the plastic bracket 05
    iPhone 8 - Installing the plastic bracket 06
    Used tools
    Wiha PicoFinish Phillips Screwdriver PH00
    Piergiacomi Tweezers 2a SA ESD
    • 1 × 2.5 mm Phillips
    • 1 × 1.4 mm Phillips
    • 2 × 1.2 mm Phillips
    • 2 × 1.0 mm Phillips
    1. Put the connecting piece back into its position and fasten it with the Phillips-screws.
    2. Now reinstall the plastic bracket and fasten it with Phillips-screws as well.
    Used tools
    Wiha PicoFinish Phillips Screwdriver PH00
    Piergiacomi Tweezers 2a SA ESD
  30. Attaching the connector of the volume control cable

    iPhone 8 - Attaching the connector of the volume control cable 01
    iPhone 8 - Attaching the connector of the volume control cable 02
    iPhone 8 - Attaching the connector of the volume control cable 03
    iPhone 8 - Attaching the connector of the volume control cable 04
    iPhone 8 - Attaching the connector of the volume control cable 05
    • Connector
    • 1 × 1.1 mm Phillips
    • 1 × 2.7 mm Phillips
    1. Attach the connector of the volume control cable again.
    2. Put the bracket plate back on the connector and fasten it with the screws.
  31. Installing the iSight camera

    iPhone 8 - Installing the iSight camera  01
    iPhone 8 - Installing the iSight camera  02
    iPhone 8 - Installing the iSight camera  03
    iPhone 8 - Installing the iSight camera  04
    iPhone 8 - Installing the iSight camera  05
    iPhone 8 - Installing the iSight camera  06
    Used tools
    Wiha PicoFinish Phillips Screwdriver PH00
    Piergiacomi Tweezers 2a SA ESD
    • Connector
    • 1 × 2.9 mm Phillips
    • 1 × 3.0 mm Standoff
    1. Press the camera back into its opening.
    2. Attach the camera connector.
    3. Put the bracket plate of the camera back on and screw it tight.
    Used tools
    Wiha PicoFinish Phillips Screwdriver PH00
    Piergiacomi Tweezers 2a SA ESD
  32. Attaching a new adhesive frame

    iPhone 8 - Attaching a new adhesive frame 01
    iPhone 8 - Attaching a new adhesive frame 02
    iPhone 8 - Attaching a new adhesive frame 03
    iPhone 8 - Attaching a new adhesive frame 04
    iPhone 8 - Attaching a new adhesive frame 05
    iPhone 8 - Attaching a new adhesive frame 06
    Used tools
    Piergiacomi Tweezers 2a SA ESD

    After attaching a new adhesive frame, iPhone 8 is again protected against dust and splash water, but is no longer 100% waterproof.

    1. First remove all adhesive residue on the metal frame and display to ensure that the new adhesive frame fits properly.
    2. Try to align the adhesive frame with the back cover of your iPhone in order to position it correctly.

    The corners are different and help with orientation.

    1. Remove the first protective film from the adhesive frame.
    2. Then place it on one side and apply it gradually to the edge of the back cover.
    3. Now also remove the remaining protective films so that only a thin strip of transparent adhesive film remains on the edge of the iPhone.
    Used tools
    Piergiacomi Tweezers 2a SA ESD
  33. Attaching the FaceTime connector

    iPhone 8 - Attaching the FaceTime connector 01
    iPhone 8 - Attaching the FaceTime connector 02
    iPhone 8 - Attaching the FaceTime connector 03
    iPhone 8 - Attaching the FaceTime connector 04
    iPhone 8 - Attaching the FaceTime connector 05
    Used tools
    Wiha PicoFinish Phillips Screwdriver PH00
    Piergiacomi Tweezers 2a SA ESD
    • Connector
    • 3 × 1,0 mm Phillips-Schraube
    1. Place the display upright on the frame and connect the FaceTime connector to the logicboard.
    2. Place the display on the side of the backcover.
    3. Place the cover plate over the FaceTime-connector and fix it with the three Phillips screws.
    Used tools
    Wiha PicoFinish Phillips Screwdriver PH00
    Piergiacomi Tweezers 2a SA ESD
  34. Connecting the display

    iPhone 8 - Connecting the display 01
    iPhone 8 - Connecting the display 02
    iPhone 8 - Connecting the display 03
    iPhone 8 - Connecting the display 04
    • Connector
    1. Connect the two display connectors (display and home button) to the logicboard again.
  35. Attaching the display

    iPhone 8 - Attaching the display 01
    iPhone 8 - Attaching the display 02
    iPhone 8 - Attaching the display 03
    iPhone 8 - Attaching the display 04
    iPhone 8 - Attaching the display 05
    • Wrong position
    • Right position
    1. Place the display on the side of the back cover and carefully fold it over.
    2. Make sure that the silver chip on the cable is positioned exactly as before (see photo). Otherwise, you will see discolorations and spots on the screen at this exact spot after installation. If you notice this error, check the position of the cable again and align the chip exactly like in our photo.

    3. Then press the display firmly over the entire surface.
  36. Attaching the battery connector

    iPhone 8 - Attaching the battery connector 01
    iPhone 8 - Attaching the battery connector 02
    iPhone 8 - Attaching the battery connector 03
    iPhone 8 - Attaching the battery connector 04
    iPhone 8 - Attaching the battery connector 05
    Used tools
    Wiha PicoFinish Phillips Screwdriver PH00
    Piergiacomi Tweezers 2a SA ESD
    • Connector
    • 2 × 2.6 mm Phillips
    • 2 × 1,0 mm Phillips-Schraube
    1. Reconnect the battery by reattaching the battery connector.
    2. Put the bracket plate over the battery connector and secure it with the four screws.
    Used tools
    Wiha PicoFinish Phillips Screwdriver PH00
    Piergiacomi Tweezers 2a SA ESD
  37. Fastening the rear case screws

    iPhone 8 - Fastening the rear case screws  01
    iPhone 8 - Fastening the rear case screws  02
    Used tools
    Wiha PicoFinish Pentalobe Screwdriver PL1
    • 2 × 3.4 mm Pentalobe
    1. Screw the two pentalobe screws left and right of the Lightning connector back into the rear case.
    Used tools
    Wiha PicoFinish Pentalobe Screwdriver PL1
Ø 5 (2 Ratings)

Bewerte unsere Anleitung

Hat dir unsere Anleitung weitergeholfen? Wir sind auf deine Beurteilung gespannt.

Submit rating

Submit rating

How did you like this repair guide?

Exceptional

Similar guides

You might also be interested in these guides.

You might be interested in

Get in touch with iDoc

Please contact our customer service for any questions about iDoc's products and services.

  • Send a message

    If you have a question about a guide or want to give us general feedback, just use our contact form

    Write a message
  • Free shipping

    From a minimum order value of 79.00 € your order will be shipped free of charge within Germany.

  • Call iDoc

    If you have any questions about our guides or services, call us from Monday to Friday, 10:00 a.m. to 6:00 p.m.

    +49 30 200 514 455
  • 5 star service

    We offer top quality and service. Our customers confirm this as well.

    Show reviews

Profi-Insights & Tipps für deine erfolgreiche Handy-Reparatur

iDoc schenkt dir den ultimativen Reparatur-Guide GUIDE GRATIS ANFORDERN

Profi-Insights & Tipps für deine erfolgreiche Handy-Reparatur

iDoc schenkt dir den ultimativen Reparatur-Guide GUIDE GRATIS ANFORDERN