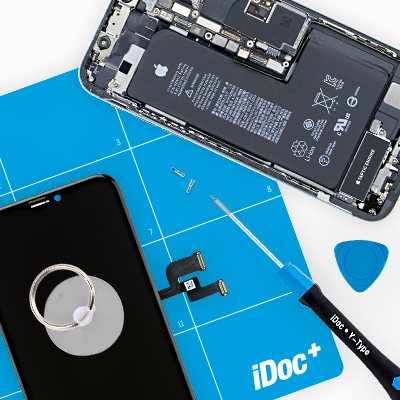
In this step-by-step guide, we will show you how you can easily replace the display of your Galaxy A13 yourself.

If the glass of your display is heavily cracked, you should secure it with parcel tape. This way you avoid possible injuries during the repair.

To avoid scratches on the case and replacement display, you should make sure that your workspace is clean and level.

We wish you good luck with your repair!

Required tools

  • Tool for prying out batteries

    Tool for prying out batteries

    You have to use a very stable tool to pry out the battery. At the same time, it has to be flat enough to insert below the battery.

    from €10.99 on Amazon
  • Flat Picks

    Flat Picks

    You need a very flat tool such as a flat pick to pry out parts that are glued in place.

    from €11.95 on Amazon
  • Heat gun

    Heat gun

    You can use a heat gun to heat parts that are glued on so they’re easier to remove. In most cases, you can also use a hairdryer.

    from €15.99 on Amazon
  • Tweezers

    Tweezers

    We recommend using tweezers to remove screws and various small parts from your device.

    on Amazon
  • Plastic prying tool

    Plastic prying tool

    You need a flat plastic prying tool to disconnect the various plugs and connectors.

    from €14.99 on Amazon
  • Phillips PH00 screwdriver

    Phillips PH00 screwdriver

    You need the right screwdriver for removing PH00 screws.

    from €10.84 on Amazon

Required replacement part

  • Samsung Galaxy A13 (SM-A137) Screen

    Samsung Galaxy A13 (SM-A137) Screen

    on Amazon
Show all replacement parts for the Galaxy A13 

Getting started with the repair of your Galaxy A13

If you get stuck or have questions, you can post a comment. We’d be happy to help.

29 steps
  1. Turn off Galaxy A13

    Galaxy A13 - Turn off Galaxy A13 01
    Galaxy A13 - Turn off Galaxy A13 02

    Before the repair, we recommend you to check all functions of the device. You are welcome to use our checklist for this, we link it to you in the video description.

    1. Before you start, turn off your device. To do so, press and hold the standby button on the side until the power off option appears on the display.
  2. Remove sim card holder

    Galaxy A13 - Remove sim card holder 01
    Galaxy A13 - Remove sim card holder 02
    1. Next, remove the sim card holder using the tool provided for this purpose.
  3. Remove back cover

    Galaxy A13 - Remove back cover 01
    Galaxy A13 - Remove back cover 02
    Galaxy A13 - Remove back cover 03
    Galaxy A13 - Remove back cover 04

    The back cover is slightly glued at the corners.

    Watch out for the fingerprint sensor cable when removing the backcover.

    1. It's best to heat the corners with a hot air gun or hair dryer.
    2. Then you can insert a plectrum between the display frame and back cover and carefully loosen the brackets one by one.
  4. Remove upper board cover

    Galaxy A13 - Remove upper board cover 01
    Galaxy A13 - Remove upper board cover 02
    Used tools
    Wiha PicoFinish Phillips Screwdriver PH00
    • 8 × 4,0 mm Phillips
    1. Remove the marked Phillips screws and take off the cover.
    Used tools
    Wiha PicoFinish Phillips Screwdriver PH00
  5. Disconnecting the battery

    Galaxy A13 - Disconnecting the battery 01
    Galaxy A13 - Disconnecting the battery 02
    • Battery Connector
    1. Separate the battery connector with a non-metallic object, e.g. a spudger.
  6. Disconnect fingerprint sensor

    Galaxy A13 - Disconnect fingerprint sensor 01
    Galaxy A13 - Disconnect fingerprint sensor 02
    • Fingerprint Sensor Connector
    1. Now disconnect the fingerprint sensor connector with the spudger as well.
    2. .
  7. Disconnect connection cable

    Galaxy A13 - Disconnect connection cable 01
    Galaxy A13 - Disconnect connection cable 02
    • Connector
    1. Now detach the highlighted connector.
  8. Remove battery

    Galaxy A13 - Remove battery 01
    Galaxy A13 - Remove battery 02
    Galaxy A13 - Remove battery 03
    Galaxy A13 - Remove battery 04
    Used tools
    iPlastix Opening Tool
    1. Warm the battery carefully with a hot air gun or hair dryer. Make sure that the battery is not too warm.
    2. Then lever out the battery with a suitable tool, such as the battery spudger. In any case, make sure not to damage any surrounding parts or cables when levering.

    If the bonding is difficult to release, you can also use a second tool to loosen the adhesive. We recommend the iPlastix to not damage the battery.

    Used tools
    iPlastix Opening Tool
  9. Remove lower circuit board cover

    Galaxy A13 - Remove lower circuit board cover 01
    Galaxy A13 - Remove lower circuit board cover 02
    Galaxy A13 - Remove lower circuit board cover 03
    • 8 × 4,0 mm Phillips
    1. Remove the highlighted Phillips screws and then remove the cover.
  10. Remove front camera

    Galaxy A13 - Remove front camera 01
    Galaxy A13 - Remove front camera 02
    Galaxy A13 - Remove front camera 03
    • Front Camera Connector
    1. Disconnect the marked connector with a spudger and then carefully remove the front camera.
  11. Remove antenna cable

    Galaxy A13 - Remove antenna cable 01
    Galaxy A13 - Remove antenna cable 02
    Galaxy A13 - Remove antenna cable 03
    Galaxy A13 - Remove antenna cable 04
    • 4 × Antenna Connector
    1. Carefully loosen the marked antenna connectors with a tool. We like to use the ESD tweezers here.
    2. After that you can take out the cables.
  12. Remove main board

    Galaxy A13 - Remove main board 01
    Galaxy A13 - Remove main board 02
    • 1 × 2,5 mm Phillips
    1. Unscrew the marked Phillips screw and take out the motherboard.
  13. Remove the USB board

    Galaxy A13 - Remove the USB board 01
    Galaxy A13 - Remove the USB board 02
    Galaxy A13 - Remove the USB board 03
    Galaxy A13 - Remove the USB board 04
    Used tools
    Menda ESD Spudger
    • 1 × 2,5 mm Phillips
    • USB Board Connector
    1. Loosen the marked connector and the marked screw and carefully take out the USB board.
    Used tools
    Menda ESD Spudger
  14. Remove vibration motor

    Galaxy A13 - Remove vibration motor 01
    Used tools
    Piergiacomi Tweezers 2a SA ESD
    1. Take out the vibration motor with the tweezers. He is relatively strongly stuck. If in doubt, you can also heat it up.
    Used tools
    Piergiacomi Tweezers 2a SA ESD
  15. The right tools for your repair

    With the right tools, you will succeed in any repair. In our store you will find a large selection of professional quality tools.
    VIEW NOW
  16. Prepare new display

    Galaxy A13 - Prepare new display 01
    Galaxy A13 - Prepare new display 02
    Verwendete Ersatzteile
    Samsung Galaxy A13 (SM-A137) Screen
    1. Check the display visually and remove all protective films on the inside.

    You best leave the screen protector film on to avoid scratches during installation.

    Verwendete Ersatzteile
    Samsung Galaxy A13 (SM-A137) Screen
  17. Insert vibration motor

    Galaxy A13 - Insert vibration motor 01
    Galaxy A13 - Insert vibration motor 02
    1. Insert the vibration motor into the new display and press it gently.
  18. Insert USB board

    Galaxy A13 - Insert USB board 01
    Galaxy A13 - Insert USB board 02
    Galaxy A13 - Insert USB board 03
    • USB Board Connector
    • 1 × 2,5 mm Phillips
    1. Now replace the USB board and screw it back in place with the appropriate 2.5mm Phillips screw.
    2. After that, reconnect the marked connector. Make sure it clicks into place with a slight click.
  19. Insert main board

    Galaxy A13 - Insert main board 01
    Galaxy A13 - Insert main board 02
    Galaxy A13 - Insert main board 03
    • 1 × 2,5 mm Phillips
    1. Place the motherboard carefully back into its guide and fasten it with the screw provided.
  20. Connect antenna cable

    Galaxy A13 - Connect antenna cable 01
    Galaxy A13 - Connect antenna cable 02
    Galaxy A13 - Connect antenna cable 03
    Galaxy A13 - Connect antenna cable 04
    • 4 × Antenna Connector
    1. Now reconnect the antenna cable with the four connectors and place the cable in the designated guide.

    Be careful and do not use too much pressure. The connectors should gently snap into place.

  21. Insert front camera

    Galaxy A13 - Insert front camera 01
    Galaxy A13 - Insert front camera 02
    Galaxy A13 - Insert front camera 03
    • Front Camera Connector
    1. Replace the front camera and connect the connector.
  22. Attach the lower cover

    Galaxy A13 - Attach the lower cover 01
    Galaxy A13 - Attach the lower cover 02
    • 8 × 4,0 mm Phillips
    1. Now put the board cover back to the one on the USB board and screw in the marked screws.
  23. Insert battery

    Galaxy A13 - Insert battery 01
    Galaxy A13 - Insert battery 02
    1. Place the battery back into the display unit and gently press it into place. Make sure that it is centered.
  24. Connecting the connection cable

    Galaxy A13 - Connecting the connection cable 01
    Galaxy A13 - Connecting the connection cable 02
    • Highlighted Connector
    1. Reconnect the selected connectors.
  25. Connect fingerprint sensor

    Galaxy A13 - Connect fingerprint sensor 01
    Galaxy A13 - Connect fingerprint sensor 02
    • Finger Sensor Connector
    1. Reconnect the fingerprint sensor connector cable to the marked slot.
  26. Connect battery

    Galaxy A13 - Connect battery 01
    Galaxy A13 - Connect battery 02
    • Battery Connector
    1. Reconnect the battery by carefully connecting the connector to designated port.
  27. Install upper board cover

    Galaxy A13 - Install upper board cover 01
    Galaxy A13 - Install upper board cover 02
    • 8 × 4,0 mm Phillips
    1. Now put the upper board cover back on and fasten it with the appropriate screws.
  28. Test replacement display

    Galaxy A13 - Test replacement display 01

    We now recommend you to test the display or the complete phone once before you reattach the back cover

    1. Turn on the phone for this and call up the hidden test menu.
    2. Open the phone app for this and enter asterisk - hash - zero - asterisk - hash.
    3. You can also use our linked checklist for this.
  29. Attach back cover

    Galaxy A13 - Attach back cover 01
    Galaxy A13 - Attach back cover 02
    1. Put the back cover back on and carefully click it all over.

    Make sure that all clips really snap into place

  30. Insert sim card holder

    Galaxy A13 - Insert sim card holder 01
    1. The last thing to do is to put the sim card holder back in place.
Ø 4.8 (6 Ratings)

Bewerte unsere Anleitung

Hat dir unsere Anleitung weitergeholfen? Wir sind auf deine Beurteilung gespannt.

Submit rating

Submit rating

How did you like this repair guide?

Exceptional

Similar guides

You might also be interested in these guides.

You might be interested in

Get in touch with iDoc

Please contact our customer service for any questions about iDoc's products and services.

  • Send a message

    If you have a question about a guide or want to give us general feedback, just use our contact form

    Write a message
  • Free shipping

    From a minimum order value of 79.00 € your order will be shipped free of charge within Germany.

  • Call iDoc

    If you have any questions about our guides or services, call us from Monday to Friday, 10:00 a.m. to 6:00 p.m.

    +49 30 200 514 455
  • 5 star service

    We offer top quality and service. Our customers confirm this as well.

    Show reviews

Profi-Insights & Tipps für deine erfolgreiche Handy-Reparatur

iDoc schenkt dir den ultimativen Reparatur-Guide GUIDE GRATIS ANFORDERN

Profi-Insights & Tipps für deine erfolgreiche Handy-Reparatur

iDoc schenkt dir den ultimativen Reparatur-Guide GUIDE GRATIS ANFORDERN