Your Samsung Galaxy A71 discharges much too fast? It won't charge at all?

Then it is time to replace the battery of your Galaxy A71. In this detailed photo tutorial, we'll explain step by step how to do this.

The battery replacement is a bit more difficult on the A71, because both the back cover and the battery itself are heavily bonded. Therefore, plan enough time for the repair.

Good luck and above all have fun with your repair! In our online store you will find the right tool kit for your Samsung Galaxy A71.

Required tools

  • Flat Picks

    Flat Picks

    You need a very flat tool such as a flat pick to pry out parts that are glued in place.

    from €11.95 on Amazon
  • Heat gun

    Heat gun

    You can use a heat gun to heat parts that are glued on so they’re easier to remove. In most cases, you can also use a hairdryer.

    from €15.99 on Amazon
  • iPlastix Opening Tool

    iPlastix Opening Tool

    Do you want to open your smartphone or lever out large parts like the battery? Then the iPlastix with its large blade will help you. The practical assistant is made of flexible, especially sturdy plastic and lies comfortably in the hand. Thanks to its design, you can even get into smaller gaps, for example to lift the screen or to prevent it from sticking together again.

    on Amazon
  • Tweezers

    Tweezers

    We recommend using tweezers to remove screws and various small parts from your device.

    on Amazon
  • Plastic prying tool

    Plastic prying tool

    You need a flat plastic prying tool to disconnect the various plugs and connectors.

    from €14.99 on Amazon
  • Phillips PH00 screwdriver

    Phillips PH00 screwdriver

    You need the right screwdriver for removing PH00 screws.

    from €10.84 on Amazon

Required replacement part

Show all replacement parts for the Galaxy A71 

Getting started with the repair of your Galaxy A71

If you get stuck or have questions, you can post a comment. We’d be happy to help.

17 steps
  1. Switching off your Galaxy A71

    Galaxy A71 - Switching off your Galaxy A71 01
    Galaxy A71 - Switching off your Galaxy A71 02

    Before you start your repair, we recommend that you test the basic functions of your phone using our checklist.This way you can rule out the possibility that anything has been damaged during the repair.

    Switch off your A71 after testing to avoid a potential short circuit.

    1. To do this, first press and hold the side and volume down key simultaneously for a few seconds.
    2. Tap on "Switch off" in the displayed menu.
    3. Your phone will now shut down completely within a few seconds.
  2. Heating up the back cover

    Galaxy A71 - Heating up the back cover 01
    Galaxy A71 - Heating up the back cover 02
    Used tools
    Heat gun

    The Galaxy A71 is opened via the firmly adhered plastic back cover. To remove it, you first have to heat the adhesive film with hot air. Use a hot air device such as a heat gun or a regular hair dryer.

    1. First, place your phone face down on a soft, clean surface.
    2. Move the hot air device evenly over the edge of the back cover.

    A rule of thumb: The edge of the back cover should only be heated up to a point where you can still touch it without burning your fingers.

    The top and bottom edges of the back cover are glued especially tightly together.
    Used tools
  3. Lifting up the back cover

    Galaxy A71 - Lifting up the back cover 01
    Galaxy A71 - Lifting up the back cover 02
    Galaxy A71 - Lifting up the back cover 03
    Galaxy A71 - Lifting up the back cover 04
    Used tools
    iFlex Opening Tool
    VAKUPLASTIC Suction Cup

    As soon as the edge of the back cover has warmed up sufficiently, you can start to carefully remove it from the middle frame.

    Opening the Galaxy A71 will void the manufacturer's warranty.

    1. Place a suction cup in the lower part of the back cover and pull it upwards to create a narrow gap between back cover and middle frame.
    2. At the same time try to insert a flat, stable tool into the gap to enlarge it. We recommend the iFlex for this.

    The iFlex is made of very thin, stable metal and has sharp edges.To avoid scratching the frame of your device, we recommend to use the iFlex only at the beginning and to continue as early as possible with a plastic tool.The easiest way to insert your tool is to place it in one of the two corners of the lower frame of your device.

    Used tools
    iFlex Opening Tool
    VAKUPLASTIC Suction Cup
  4. Detaching the back cover

    Galaxy A71 - Detaching the back cover 01
    Galaxy A71 - Detaching the back cover 02
    Galaxy A71 - Detaching the back cover 03
    Galaxy A71 - Detaching the back cover 04
    Used tools
    Heat gun
    Flat Picks
    iPlastix Opening Tool

    In the next step the back cover can be completely detached and removed.

    Be careful not to insert your tool too far into the device to avoid damaging components.

    1. Remove the back cover from the middle frame piece by piece by moving a plastic tool along the edge of the back cover. For this purpose we use the iPlastix.
    The iPlastix is made of thin, flexible plastic. Unlike the iFlex, it has no sharp edges.
    1. Insert flat plastic picks at the loosened points of the back cover frame at regular intervals, so that the adhesive cannot rebond.

    Warm up the glue with hot air at regular intervals to make it easier to loosen.

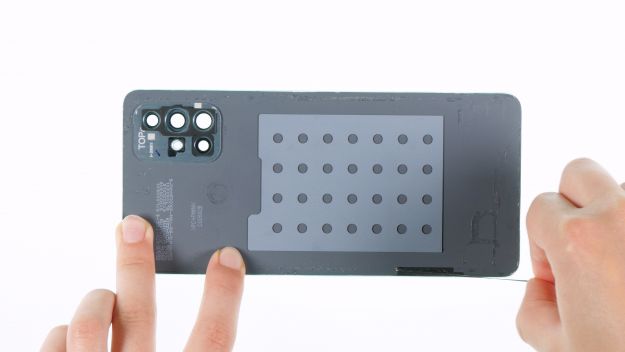
    1. One the back cover is entirely detached, unfold it carefully and put it aside.
    Used tools
    iPlastix Opening Tool
  5. Removing the SIM tray

    Galaxy A71 - Removing the SIM tray 01
    Galaxy A71 - Removing the SIM tray 02
    Galaxy A71 - Removing the SIM tray 03
    Used tools
    SIM Tool
    Wiha PicoFinish Phillips Screwdriver PH00
    Magnetic Pad
    • 14 × 3.4 mm Phillips

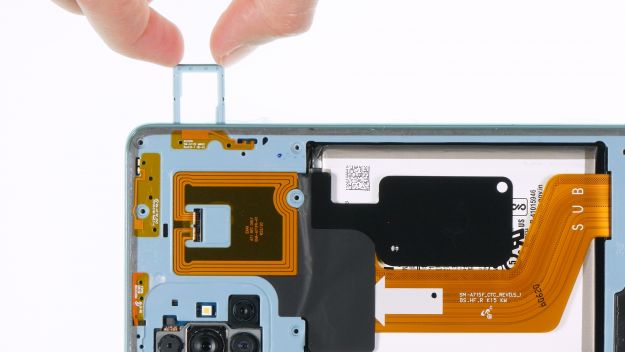
    The middle frame is firmly hooked into the display unit with plastic lugs. Before you can take it off, the SIM tray must be removed.

    1. First loosen all screws that fix the middle frame to the display unit with a Phillips screwdriver.

    For the storage of loosened screws and small components it is advisable to use a screw storage box. We recommend our magnetic pad for this purpose. On this pad, the removed components can be arranged in the same way as they were installed in the telephone.

    1. Then press with a SIM tool or other pointed object into the small opening next to the SIM tray to be able to pull it out of the middle frame.
    Used tools
    Wiha PicoFinish Phillips Screwdriver PH00
    Magnetic Pad
  6. Detaching the middle frame

    Galaxy A71 - Detaching the middle frame 01
    Galaxy A71 - Detaching the middle frame 02
    Galaxy A71 - Detaching the middle frame 03
    Galaxy A71 - Detaching the middle frame 04
    Used tools
    Pick Set

    You can now start to separate the middle frame from the display unit. We recommend to take your Galaxy A71 in your hand for this.

    1. Insert a flat, stable tool between middle frame and display unit. We use a hard plastic pick for this step.
    The hard plastic pick is particularly easy to grip due to its shape. It consists of stable plastic and has narrow corners. This makes it easy to insert, while at the same time you can't stick the tool too deep into your phone and potentially damage something.Do not apply too much force at the height of the keys and the SIM slot, as the middle frame is more unstable at these points.
    1. Separate the plastic lugs of the middle frame from the display unit by running your tool once along the middle frame and pressing it upwards at the same time.
    2. Put the middle frame to the side and turn the display unit with the screen down again.


    Used tools
  7. Disconnecting the battery

    Galaxy A71 - Disconnecting the battery 01
    Galaxy A71 - Disconnecting the battery 02
    Galaxy A71 - Disconnecting the battery 03
    Used tools
    Pry Tool
    • Connector

    To prevent a short circuit during the repair, you should disconnect the battery from the mainboard as soon as possible.

    When detaching the battery connector make sure that you start from the side where there are no small components on the board. This will prevent possible damage.

    1. Use a sturdy plastic lever tool to slide under the battery connector and carefully lift it off. We recommend a handy plastic spudger for this purpose.
    Used tools
  8. Detaching the flex cabel

    Galaxy A71 - Detaching the flex cabel 01
    Galaxy A71 - Detaching the flex cabel 02
    Galaxy A71 - Detaching the flex cabel 03
    Used tools
    Pry Tool
    • Connector

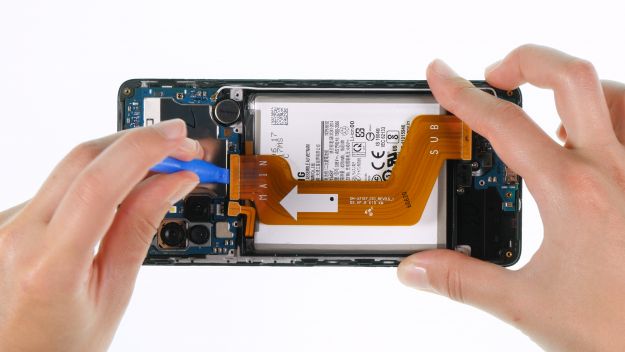
    Above the battery runs a flex cable that connects the mainboard and the USB board.

    When detaching the flex cable connectors make sure that you start from the side where there are no small components on the board. This way you avoid possible damage.

    1. Use the plastic spudger to move under the flex cable connectors one after the other, and carefully lift them off.
    2. Then put the detached flex cable aside.
    Used tools
  9. The right tools for your repair

    With the right tools, you will succeed in any repair. In our store you will find a large selection of professional quality tools.
    VIEW NOW
  10. Removing the battery

    Galaxy A71 - Removing the battery 01
    Galaxy A71 - Removing the battery 02
    Galaxy A71 - Removing the battery 03
    Galaxy A71 - Removing the battery 04
    Used tools
    iPlastix Opening Tool
    Battery Spudger

    The battery of the Galaxy A71 is glued in the display unit over a wide area. In order to remove it, you must first heat the glue with hot air.

    Never heat the heat-sensitive battery directly, but always from the side of the screen only .When removing the battery, take care not to bend it or damage it otherwise.

    1. Turn your phone with the screen facing up and move hot air evenly over the area where the battery is located.
    2. Turn the display unit over again and use a sturdy plastic tool to slide it under one edge of the battery to gently lift it up. We use the battery spudger for this.
    3. If the battery is slightly loosened, you can use a flat, flexible tool such as the iPlastix to slide it under the battery to completely detach it from the display unit.
    Used tools
    iPlastix Opening Tool
    Battery Spudger
  11. Inserting the new battery

    Galaxy A71 - Inserting the new battery 01
    Galaxy A71 - Inserting the new battery 02
    Galaxy A71 - Inserting the new battery 03

    The replacement battery of the Galaxy A71 already comes with an adhesive surface on the back.

    1. To make sure that the battery lies flat again, you should first remove the adhesive residues inside the display unit.

    The battery must be aligned correctyl. The battery connector helps you with it.

    1. Then peel off the protective film from the battery's back and press it firmly.
  12. Connecting the flex cabel

    Galaxy A71 - Connecting the flex cabel 01
    Galaxy A71 - Connecting the flex cabel 02
    Galaxy A71 - Connecting the flex cabel 03
    Galaxy A71 - Connecting the flex cabel 04
    • Connector

    After inserting the battery, the flex cable can be reconnected.

    1. Position the flex cable above the battery. The labels on the cable help you align it correctly.

    Never attach connectors with force. Damaging a connector can lead to the failure of an entire component.

    1. Attach the flex cable connectors on the mainboard and the USB board each.
  13. Connecting the battery

    Galaxy A71 - Connecting the battery 01
    Galaxy A71 - Connecting the battery 02
    Galaxy A71 - Connecting the battery 03
    • Connector

    Now also reconnect the battery.

    Never attach connectors with force. Damaging a connector can lead to the failure of an entire component.

    1. Carefully press the battery connector on the mainboard, so that you can hear and feel it click into place.
  14. Attaching the middle frame

    Galaxy A71 - Attaching the middle frame 01
    Galaxy A71 - Attaching the middle frame 02

    Once the battery is connected, the middle frame can be reattached.

    1. Place the middle frame on the display unit and press it firmly so that it clicks into place from all sides.

    Make sure that the frame does not protrude anywhere.

  15. Inserting the SIM tray

    Galaxy A71 - Inserting the SIM tray 01
    Galaxy A71 - Inserting the SIM tray 02
    Galaxy A71 - Inserting the SIM tray 03
    Galaxy A71 - Inserting the SIM tray 04
    Used tools
    Wiha PicoFinish Phillips Screwdriver PH00
    • 14 × 3.4 mm Phillips

    To complete the attachment of the middle frame, the SIM tray must be reinstalled. In addition, the frame is screwed together.

    1. Slide the SIM tray into the middle frame of your Galaxy A71.

    The printing on the SIM tray must point towards the screen.

    If the SIM tray does not slide in easily, the mainboard may not be seated properly.

    1. Finally fix the middle frame to the display unit with the Phillips screws.
    Used tools
    Wiha PicoFinish Phillips Screwdriver PH00
  16. Testing your Galaxy A71

    Galaxy A71 - Testing your Galaxy A71 01
    Galaxy A71 - Testing your Galaxy A71 02
    Galaxy A71 - Testing your Galaxy A71 03
    Galaxy A71 - Testing your Galaxy A71 04

    Before you glue the back cover of your A71 again, you should test the functionality of the replacement screen.

    1. Switch on your phone and enter *#0*# in the number field to access the Samsung test menu.
    2. For example, test whether the new screen shows the colors correctly and whether the touch works everywhere on the screen.

    You can also test other components, such as the vibration motor and speakers.

    1. If everything works as expected, you can close the device. If not, check again if everything is properly installed and connected.
  17. Attaching a new adhesive frame

    Galaxy A71 - Attaching a new adhesive frame 01
    Galaxy A71 - Attaching a new adhesive frame 02
    Galaxy A71 - Attaching a new adhesive frame 03
    Used tools
    Pry Tool
    Piergiacomi Tweezers 2a SA ESD

    Normally the adhesive residues on the edge of the back cover are sufficient to close your smartphone. However, clumps of glue can cause the back cover to not lie evenly. So if you want to be on the safe side, remove the residues and attach a new adhesive frame.

    1. First remove the old adhesive frame from the inside of the back cover.
    2. Align the new frame with the back cover on trial.

    The corners of the adhesive frame are different and will help you align it correctly.

    1. Once the frame is correctly aligned, you can pull off the first protective film from the frame's bottom and press the frame on the edge of the back cover.

    A spudger will help you to attach the frame as smooth as possible.

    1. Now remove the remaining films from the top of the adhesive frame, so that only the black adhesive film remains on the edge of the back cover.
    Used tools
    Piergiacomi Tweezers 2a SA ESD
  18. Attaching the back cover

    Galaxy A71 - Attaching the back cover 01
    Galaxy A71 - Attaching the back cover 02
    Galaxy A71 - Attaching the back cover 03
    Galaxy A71 - Attaching the back cover 04
    Galaxy A71 - Attaching the back cover 05
    Used tools
    Heat gun

    Once the repair is complete, the Galaxy A71 is closed with the back cover.

    1. Position the back cover over the display unit.
    2. Press it evenly by running your fingers once along the entire edge of the back cover.
    3. Finally, heat the back cover again, and weigh it down for half an hour, so that the glue can bond firmly again.

    We used clamps to press the back cover firmly back into place. To weigh it down, you can simply use a heavy object, such as a thick book.

    Used tools
Ø 4.9 (7 Ratings)

Bewerte unsere Anleitung

Hat dir unsere Anleitung weitergeholfen? Wir sind auf deine Beurteilung gespannt.

Submit rating

Submit rating

How did you like this repair guide?

Exceptional

Similar guides

You might also be interested in these guides.

You might be interested in

Get in touch with iDoc

Please contact our customer service for any questions about iDoc's products and services.

  • Send a message

    If you have a question about a guide or want to give us general feedback, just use our contact form

    Write a message
  • Free shipping

    From a minimum order value of 79.00 € your order will be shipped free of charge within Germany.
  • Call iDoc

    If you have any questions about our guides or services, call us from Monday to Friday, 10:00 a.m. to 6:00 p.m.

    +49 30 200 514 455
  • 5 star service

    We offer top quality and service. Our customers confirm this as well.

    Show reviews

Profi-Insights & Tipps für deine erfolgreiche Handy-Reparatur

iDoc schenkt dir den ultimativen Reparatur-Guide GUIDE GRATIS ANFORDERN

Profi-Insights & Tipps für deine erfolgreiche Handy-Reparatur

iDoc schenkt dir den ultimativen Reparatur-Guide GUIDE GRATIS ANFORDERN