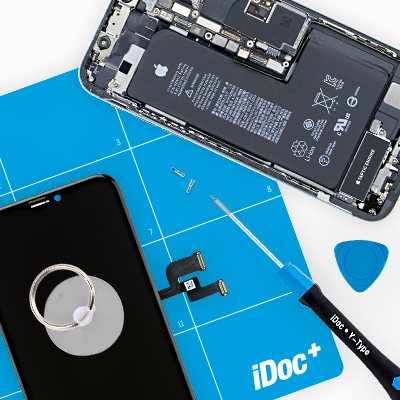
The back cover of your Xiaomi Redmi Note 8 Pro is broken? You want to pimp it with a new color?

In both cases we will show you step by step how to change the back cover of your Redmi Note 8 Pro on your own to make it shine again.

In our online store you'll find our iDoc tool kit with all necessary tools for the repair.

Good luck and lots of fun with replacing your back cover!

Required tools

  • Flat Picks

    Flat Picks

    You need a very flat tool such as a flat pick to pry out parts that are glued in place.

    from €11.95 on Amazon
  • Heat gun

    Heat gun

    You can use a heat gun to heat parts that are glued on so they’re easier to remove. In most cases, you can also use a hairdryer.

    from €15.99 on Amazon
  • iFlex Opening Tool

    iFlex Opening Tool

    Opening your smartphone can be a very delicate operation, especially if the glue is very persistent. The blade of the flexible but sturdy iFlex measures just 0.15 mm, so it fits in even the smallest gaps, such as between the screen and the frame. The practical iFlex is made of stainless steel and sits comfortably in the hand. This makes it the perfect assistant for every smartphone repair.

    from €10.95 on Amazon
  • iPlastix Opening Tool

    iPlastix Opening Tool

    Do you want to open your smartphone or lever out large parts like the battery? Then the iPlastix with its large blade will help you. The practical assistant is made of flexible, especially sturdy plastic and lies comfortably in the hand. Thanks to its design, you can even get into smaller gaps, for example to lift the screen or to prevent it from sticking together again.

    on Amazon

Required replacement part

Show all replacement parts for the Xiaomi Redmi Note 8 Pro 

Getting started with the repair of your Xiaomi Redmi Note 8 Pro

If you get stuck or have questions, you can post a comment. We’d be happy to help.

5 steps
  1. Switching off the Xiaomi Redmi Note 8 Pro

    Xiaomi Redmi Note 8 Pro - Switching off the Xiaomi Redmi Note 8 Pro 01
    Xiaomi Redmi Note 8 Pro - Switching off the Xiaomi Redmi Note 8 Pro 02
    Xiaomi Redmi Note 8 Pro - Switching off the Xiaomi Redmi Note 8 Pro 03

    Before you start the repair, we recommend that you use our checklist to test the basic functions of your phone. This will enable you to check after the repair whether you did everything right. Switch off your Xiaomi Redmi Note 8 Pro after testing to avoid a potential short circuit during the repair.

    1. To do this, first press and hold the power button for a few seconds.
    2. Tap "Power Off" in the menu that appears.
    3. Your smartphone will now shut down completely within a few seconds.
  2. Heating up the back cover

    Xiaomi Redmi Note 8 Pro - Heating up the back cover 01
    Xiaomi Redmi Note 8 Pro - Heating up the back cover 02
    Used tools
    Heat gun

    The Xiaomi Redmi Note 8 Pro is opened via the heavily bonded glass back cover. In order to remove it, you have to heat the glue with hot air first. Use a hot air device such as a heat gun or an ordinary hair dryer.

    1. Place your phone face down on a soft, clean surface.
    2. Move the hot air tool evenly over the edge of the back cover.

    As a rule of thumb, heat the edge of the back cover just enough, so that you can still touch it without burning your fingers.At the upper edge as well as around the camera lenses the back cover is especially strongly glued.

    Used tools
  3. The right tools for your repair

    With the right tools, you will succeed in any repair. In our store you will find a large selection of professional quality tools.
    VIEW NOW
  4. Lifting up the back cover

    Xiaomi Redmi Note 8 Pro - Lifting up the back cover 01
    Xiaomi Redmi Note 8 Pro - Lifting up the back cover 02
    Xiaomi Redmi Note 8 Pro - Lifting up the back cover 03
    Used tools
    iFlex Opening Tool
    iPlastix Opening Tool
    VAKUPLASTIC Suction Cup

    Once the glue of the back cover is sufficiently heated, you can start to carefully remove it from the display unit.

    Opening the Xiaomi Redmi Note 8 Pro will void the manufacturer's warrant

    1. To begin, place a suction cup at the lower part of the back cover and pull it slowly upwards to create a narrow gap between back cover and display frame.
    2. Increase the gap by inserting a flat, stable tool into the gap. We recommend the iFlex and iPlastix for this purpose.

    The iFlex is made of particularly thin, stable metal and has sharp edges. The iPlastix on the other hand is made of flexible plastic with rounded edges. To avoid scratching the frame of your device, we recommend that you start with the iFlex at this stage and continue with the iPlastix as early as possible

    The easiest way to insert the tool is to place it in one of the two corners of the lower frame.

    Used tools
    iFlex Opening Tool
    iPlastix Opening Tool
    VAKUPLASTIC Suction Cup
  5. Detaching the back cover

    Xiaomi Redmi Note 8 Pro - Detaching the back cover 01
    Xiaomi Redmi Note 8 Pro - Detaching the back cover 02
    Xiaomi Redmi Note 8 Pro - Detaching the back cover 03
    Xiaomi Redmi Note 8 Pro - Detaching the back cover 04
    Xiaomi Redmi Note 8 Pro - Detaching the back cover 05
    Used tools
    Flat Picks
    iPlastix Opening Tool
    VAKUPLASTIC Suction Cup

    Once a gap is created, you can detach the backcover from the display unit piece by piece.

    Be especially careful when loosening the back cover, as it is made of glass and can therefore break easily.

    1. Move the tool along the edge of the back cover.
    2. Press the back cover upwards at the same time to separate it from the display.

    Plug flat plastic picks at regular intervals into the loosened areas between the display and the back cover to prevent the adhesive from reconnecting. Insert the picks with the broad side facing inwards.

    To make it easier to loosen, you can reheat the glue with hot air at regular intervals.

    1. Put the back cover aside as soon as it is completely detached.
    Used tools
    iPlastix Opening Tool
    VAKUPLASTIC Suction Cup
  6. Installing the back cover

    Xiaomi Redmi Note 8 Pro - Installing the back cover 01
    Xiaomi Redmi Note 8 Pro - Installing the back cover 02
    Xiaomi Redmi Note 8 Pro - Installing the back cover 03

    After the old back cover is removed, the new one can be attached. An adhesive frame is already attached to it.

    Since we did not install a new back cover for this guide, you can see the former one on the following photos.

    1. First remove the protective film from the adhesive frame on the inside of the new back cover.
    2. Align the back cover over the display unit and press it firmly.
    3. Run hot air over the edge of the back cover to warm up the adhesive frame.

    In addition, you should weigh down your Xiaomi with books for about half an hour to allow the glue to rebond properly.

Ø 4.7 (3 Ratings)

Bewerte unsere Anleitung

Hat dir unsere Anleitung weitergeholfen? Wir sind auf deine Beurteilung gespannt.

Submit rating

Submit rating

How did you like this repair guide?

Exceptional

Similar guides

You might also be interested in these guides.

You might be interested in

Get in touch with iDoc

Please contact our customer service for any questions about iDoc's products and services.

  • Send a message

    If you have a question about a guide or want to give us general feedback, just use our contact form

    Write a message
  • Free shipping

    From a minimum order value of 79.00 € your order will be shipped free of charge within Germany.

  • Call iDoc

    If you have any questions about our guides or services, call us from Monday to Friday, 10:00 a.m. to 6:00 p.m.

    +49 30 200 514 455
  • 5 star service

    We offer top quality and service. Our customers confirm this as well.

    Show reviews

Profi-Insights & Tipps für deine erfolgreiche Handy-Reparatur

iDoc schenkt dir den ultimativen Reparatur-Guide GUIDE GRATIS ANFORDERN

Profi-Insights & Tipps für deine erfolgreiche Handy-Reparatur

iDoc schenkt dir den ultimativen Reparatur-Guide GUIDE GRATIS ANFORDERN